 |
|
|
|
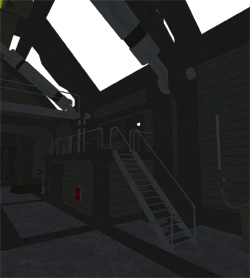
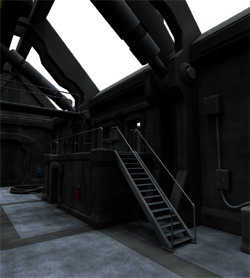
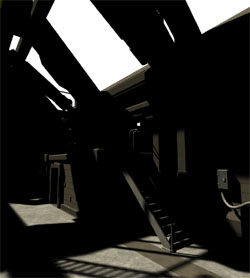
Part 4: Rendering the Ambient, Sky & Sun components individually and compositing the layers in Photoshop So we´ve been using the LDP as a whole unit until now. But there´s more power here, than you thought was possible! You have propably been doing re-renders several times until you are satisfied with the results. But we don´t need to do that. There´s a much faster way - that gives shorter re-rendering time and much more control! This simple, yet effective technique - can also be used to mix resolutions of the three main LDP parts. For instance - you can use the sun from Low EX - and mix it with the enhanced shadows from the Sky of the High rez. First of all - choose the preset of your choice (allthough this and more can be controlled in postwork). As you add the LDP, remove the Sun and Sky objects. You are now left with Ambient Light only. Crank up all the Ambient Lights up to 5% intensity - so that they will light up the scene a bit more. We will control the intensity later on. After you are done with the Ambient Render, save it as Ambient.PNG - as this preserves the background as a transparent map. Now, undo twice, so you get back the Sun + Sky objects. This time, remove the Ambient + Sun objects. This will leave you with the Sky object only. Re-render. Save as Sky.PNG. Undo twice again - and this time remove Ambient + Sky - leaving you with the Sun Light only. And re-render a third time. Save as Sun.PNG. Now, if you are not satisfied with the Sun Shadows - you can re-render JUST that part. See the time savings here? Don´t worry about intensity - we´ll control that later on. For this tutorial, i amped the Sky Lights + Sun Lights way above the normal level. First, because it´s inside (and the only way the light enters this hangar is via the removed celing) - and second - because we are rendering individual parts. The result should be something like this: (From left: Ambient, Sky and Sun)
So, we have our three images - and it´s time to load them into Photoshop! (Or any other image program that can handle layers) Before you load anything, create an empty image that has the same dimensions as your PNG images. Make it Black. Now, load the three parts. Next, select the Ambient render, hit CTRL+A (select all) - then CTRL+C (copy). Select the empty black image - hit CTRL+V (paste). You should now have the ambient layer on top of your black layer.
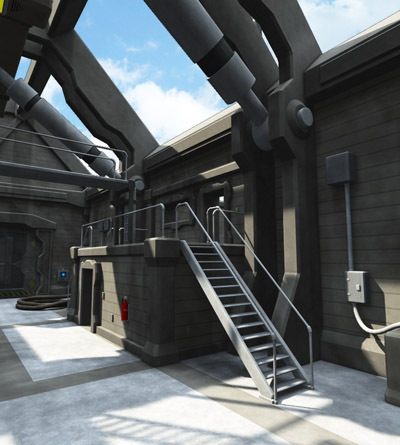
This will leave you with a 4 layered image - with the black at the bottom, followed by the Ambient, Sky and finally sun layer. Now, adjust each layer (besides the black one) - to SCREEN instead of NORMAL. Imediatelly, you can see a composite. You are now free to adjust each layers intensity, tint, color, softness or whaterver you want - WITHOUT any re-renders! When you feel satisfied, merge the VISIBLE layers (From the Layers menu) as this preserves the transparency. Do not add the sky before you merge these layers - as you are using SCREEN - that will simply not work. Next, you can add a background if you want - in this case one of the Mid Day Sky Backgrounds available in the package. Load it into Photoshop, crop / resize it if needed. Add the mixed layer on top of this one. Adjust intensity of the sky layer if needed. Here´s a final composite. No postwork besides adjusting the intensity! Have fun!
|
 Repeat with
the Sky - and then the Sun render.
Repeat with
the Sky - and then the Sun render. |
Copyright 2005-2007 Waldemar Belwon. All Rights Reserved. |