 |
|
|
|
Part 2: Moving the sun to your advantage & controlling it´s shadows Ok, we are ready to turn up the heat! After having covered the three parts of the LDP in part 1, let´s move on to the most important one of them: The sun! Where you place your sun, will have tremendous impact on your final render. Most importantly, we´ll cover a simple yet effective technique - that enables you to precisley control where the sun will cast it´s shadows...
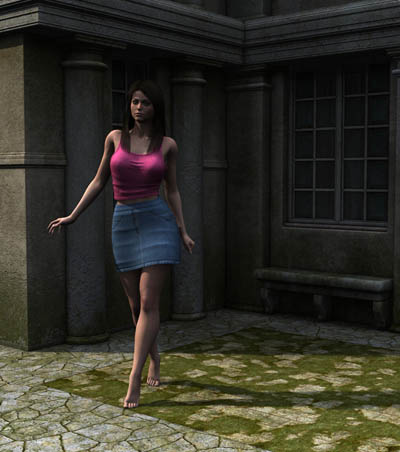
This render illustrates what happends when we just set up this scene, and click on render - straight out of the package. The only adjustment made, is the sun shadow blur effect (see your manual on how to change it). It´s been altered from 1.5% to 2.5%. The reason is to better show off what the shadows do. This is rendered using the Mid Day, Med Rez EX version.
Y is the elevation, or how high the sun is above your scene. The other two, X and Z determine the actual position of the sun - as if you would observe everything from the air - and having your sun just beneath yourself. You will never need to rotate the sun. Just move it to a different position. The angle of the sun is changed automatically - as it targets the Sun Target. The Sun Target can be placed anywhere in your scene, and is resting at X,Y,Z = 0,0,0 by default. The angle at which the sun will hit your scene, is simply determined between the relationship of the Sun and the Sun Target.
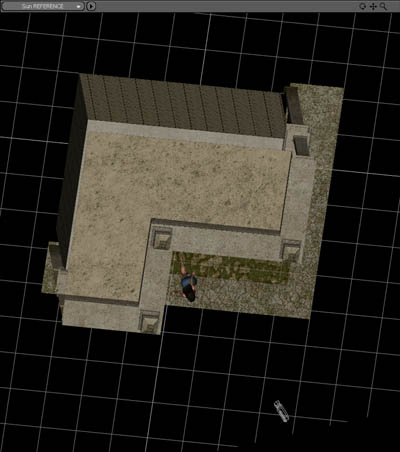
We can see the house, the girl, the camera and the selected Sun object. Also marked on the image, is the Sun Target. Observe those two points, the Sun and the Sun target. Imagine a straight line between those two. That´s the angle at which the Sun will lit your scene. If you change to Left View, you´ll see the Sun Object and Sun Target from the side - and you can imagine a similar line. This might be a bit confusing at first, but is very useful. Assume you want to place the sun regarding your main character in your scene. Well, if you place the Sun Target on your character, your imaginary line - will be between the Sun - and your character! Moving the sun can be done is several ways. While in top/left view, you can just move the Sun object. And it´s done. It´s that simple. (You may need to zoom out your scene - in order to find the Sun Object in the view - and be sure to have the MOVE tool selected)
Also, select Textured as your Drawing Mode. You should have a similar view like the image to the left. Don´t worry, it´s a bit turned around - but this is normal. The important thing here - is that this is excacly what the sun sees! This is extremely powerful - because you can see in realtime - what will be lit by the sun - and what will be left in the shadows. What you can see - will be lit by the sun. The surfaces or areas you can´t see - will be shadowed. And remember from Part 1 - what´s in the Sun shadows - will be taken care of by the Sky Light. Now, try moving the Sun object by adjusting the X,Y,Z values in the Paramters tab. See how the view changes? Let´s use this to our advantage, and move the sun to a new position. X,Y,Z = 1300, 1450, 3600.
Notice excacly the relationship between the girl and the wall behind her. Notice where her head is... What we can see - will be lit by the sun. What we can´t see - will be left in shadow... Now, let´s render!
You can use this feature to add dramatic effects. I always say - that an image is not built by light. It´s built by shadows. Light will sertainly put the mood... But the shadows will tell a story! Let´s do another one - shall we? :)
Again, watch closely where the girl is and what´s behind her. And remember - the only thing we are changing here - is the position of one single object. Nothing more. You don´t need to spend several hours figuring out where to put the sun. Use this feature - control the sun - and control the final render! Note another detail in the image to the left, before we render it. Notice how the girls upper body hides parts of her right arm. Also known as selfshadowing. By using this feature, you can control, add or avoid - the amount of selfshadowing. Let´s render and see the results!
Strrrriiiiiike! Are we having fun yet!!! Notice her shadow on the wall behind. Laser precision! And notice the selfshadowing on her right arm (left in the image). Just as predicted! Let´s do one final adjustment...
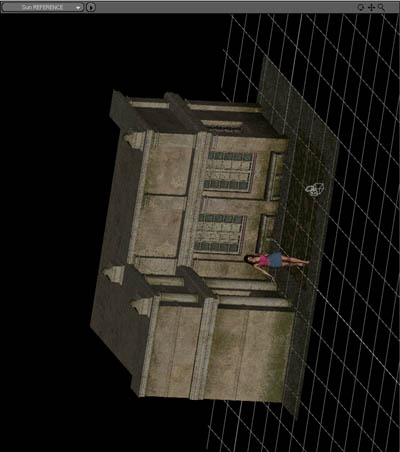
Ok, back to this wired "upside" down view, we carefully move the sun backwards in the scene - to act as a backlight. With extreme precision, we can just barely frame the buildings edges around our character.
As we can´t see the front of our building, it will be totally in shadow from the Sun. But not from the Sky! And this is where the Sky Light will take over - and give it´s share of wonderful soft shadows. To sum it up: Select the Sun Object. This is the only object you need to move. Select the Sun REFERENCE as your view. Adjust the position by altering the X,Y,Z translate in the Parameters tab. Done! Don´t forget to always switch back to Camera View, before you render. Let´s hit render one final time - and see if we can score four times in a row!
Yepp! Jackpot again! Notice the surrounding shadow edge around the girl is softer (EX versions only). Also, the backlight casts some nice light on her shoulders, separating her from the background. Now that you can master the sun and it´s shadows - you can really begin to create som magic in your images. So far, we have covered the most important aspects of the LDP. It´s three parts, Ambient Light, Sky Light and Sun Light. And we´ve learned how to control the sun. Combined, these two tutorials, give you total control over your images. As time unfold, and you start to use this light set with different scenes - you will discover situations where additional knowlege is preferable. Such as controlling the shadows from the Sky Light. And such as adding additional shadows to renders that look "flat"! Or as i would call it: How to create some drama! :) Until then - HAVE FUN!
|
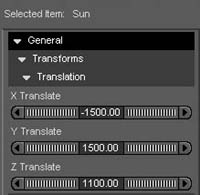 The sun
object is
resting in it´s default position: X,Y,Z = -1500, 1500, 1100.
The sun
object is
resting in it´s default position: X,Y,Z = -1500, 1500, 1100.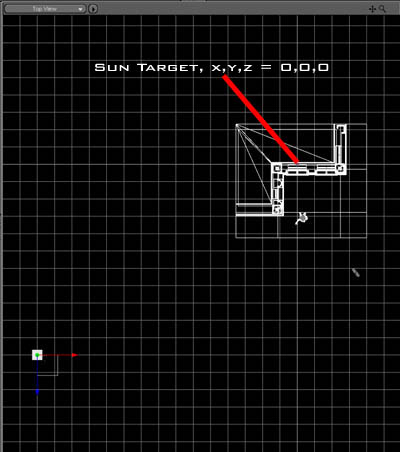
 Let´s select
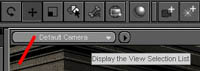
the Sun object from the Scene tab. Now, move on to the View Selection, and
select Top View. Click on the small arrow next to that and select Wire
Frame as Drawing Mode.
Let´s select
the Sun object from the Scene tab. Now, move on to the View Selection, and
select Top View. Click on the small arrow next to that and select Wire
Frame as Drawing Mode.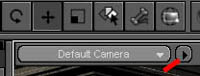 You should
see something similar to the image on the left.
You should
see something similar to the image on the left.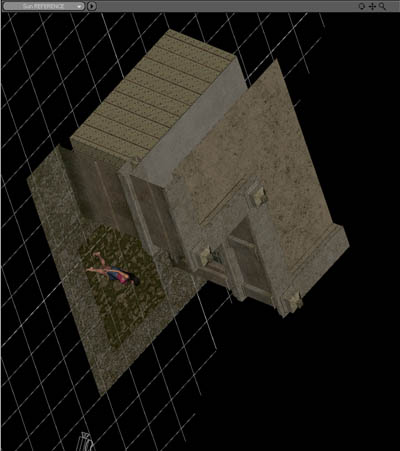
 Yeah,
i know - it´s rotating... Nothing to worry about! With this setting, the
sun is coming more head on to our scene.
Yeah,
i know - it´s rotating... Nothing to worry about! With this setting, the
sun is coming more head on to our scene.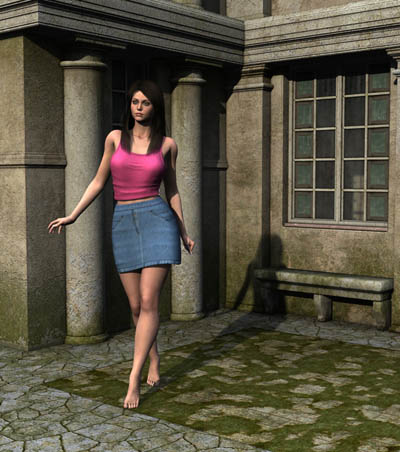 Wow! And
double wow that is! We can almost feel the sun gazing straight in her
face... The girl´s shadow is precisley where we wanted it to
be! See how easy you can control where to put shadows in your image...
Wow! And
double wow that is! We can almost feel the sun gazing straight in her
face... The girl´s shadow is precisley where we wanted it to
be! See how easy you can control where to put shadows in your image...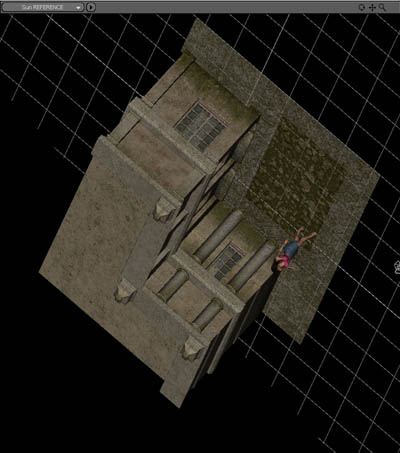
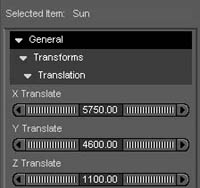 Enter X,Y,Z
= 5750, 4600, 1100 as our new Sun coordinates.
Enter X,Y,Z
= 5750, 4600, 1100 as our new Sun coordinates.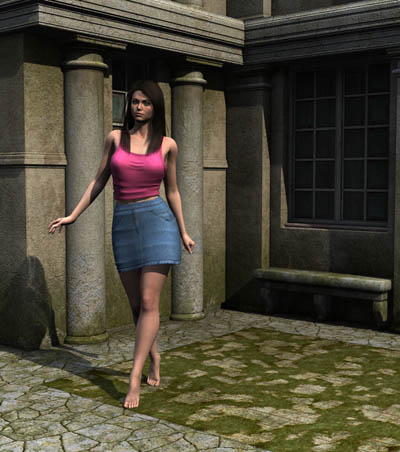
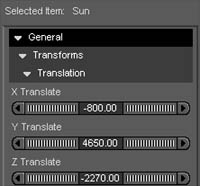 New
sun coordinates: X,Y,Z = -800, 4650, -2270.
New
sun coordinates: X,Y,Z = -800, 4650, -2270.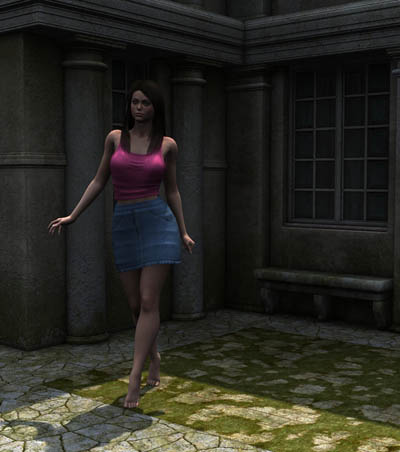
|
Copyright 2005-2007 Waldemar Belwon. All Rights Reserved. |