 |
|
|
|
Part 1: The 3 parts of the LDP - and how to master them As you may already know, the LDP consists of three independat parts - that work together as a team. Understanding this, is the single most important factor in using this light set. By default, each preset is designed and adjusted to give an average good render result - no matter what scene you choose to render. However, due to each scene beeing unique - both in camera angle towards the sun, size and position of the objects and even the textures / surfaces used - some of the LDP adjustments may need your attention. Let´s take a look at the three parts, one by one. All examples rendered using Medium Extended version:
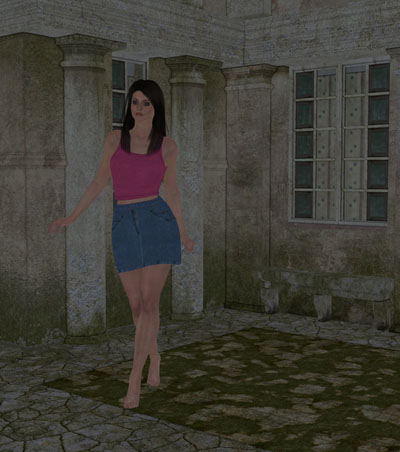
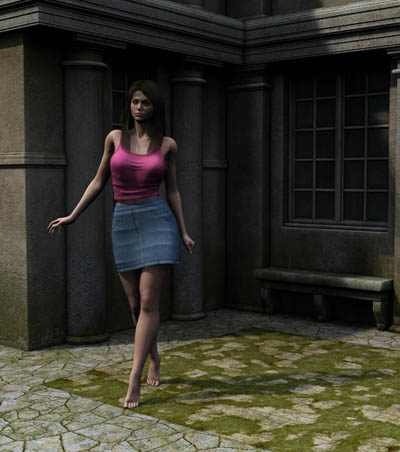
Ambient Light This part is usually not this dominant, but here brightened up so we all can see what it does. 24 evenly sprayed shadowless distant lights create an overall light. This not only brightens up the whole image, but can also be used to tint it / color it - and most importantly - cast some light where the sun / sky won´t. The 24 lights render pretty fast, and might at first seem like a useless feature, but as this tutorial unfolds - you´ll notice the power of this simple, yet powerful feature.
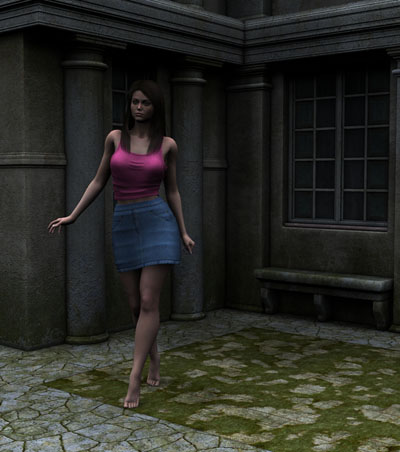
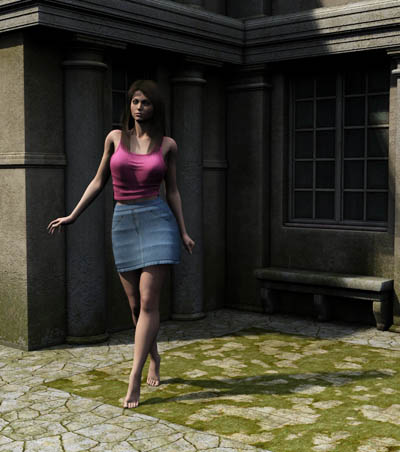
Sky Light Moving on to a more sophisticated feature, the Sky Light provides those wonderful soft shadows. Bigger objects will create greater shadows, and small objects will almost look shadowless. Just like in real world. If you move an object away from the ground, it will cast softer and less dark shadows. Notice how her skin is shadowed under the skirt. Look under the bench. And under the roof of the building. This looks like an overcast / cloudy scene but with a small, but significant difference. The shadows are very dark. This is where the ambient light comes in. But more on this as we start to mix those three parts later on. An important factor to remember considering the sky light, is that it won´t cast any spectacular shadows when dealt with completely flat objects. For instance - if this building was without the roof, and without any kind of parts that "stick out" - it would appear more flat. Just like in real life. But take a close look - at the corner of the two building walls, just to the right behind the girl. Notice how the ground seems naturally darker? This is a very realistic feature - that you´ll notice if you go outside - a cloudy day... The skylight uses 4, 18, 36 or 78 Shadow Mapped Distant Lights - depending on which resolution you choose.
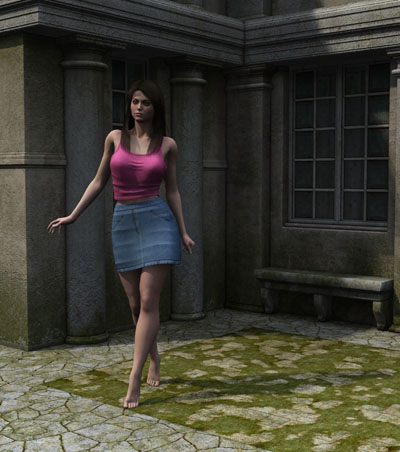
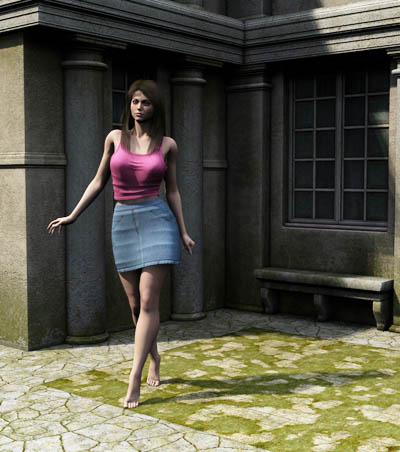
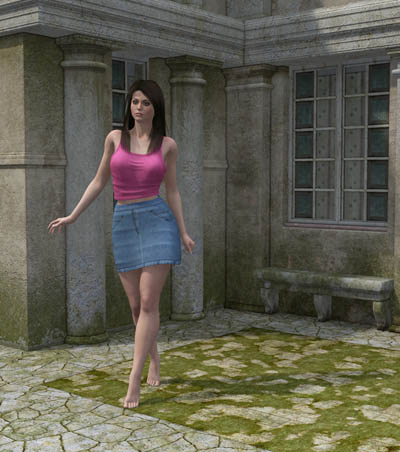
Sun Light The final part, is the sun light. This light is sharper, as you can see on the nice shadows of her feet and legs. To give this sharp shadows, the sun light uses 1, 4, 8 or 16 Raytraced Distant Lights, depending on the resolution you use. The Basic Versions only uses one, regardless resolution. You can change to Deep Shadow Maps instead - and get faster renders, with softer look. (Select all sun lights, except for Sun REFERENCE and adjust in Parameters tab). Now, notice how the girls shadow becomes more and more soft, the greater the distance? This is also a real world phenomenon, and is accurately reproduced with this light set. (This feature is ONLY available in the Extended versions) Take a look at the sharp shadow on the ground, just around the corner of the building on the left. Follow it to the right side - over and above the bench. It becomes more and more soft. You can adjust how much softness you want. The sun light position is what most users will want to adjust. In this particular example, the sun is placed a bit to the left of the camera - to create side light and show off those wonderful shadows. Sidelight/backlight is often more dramatic than just straight on. Placing the sun, is one of those things with the most significant impact on your final render and therefore - it is very important to understand and control the sun.
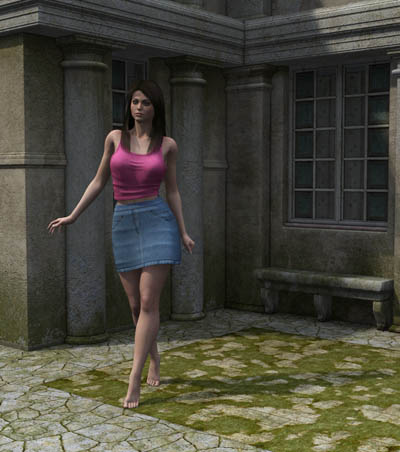
The Final Render When mixed together, we are almost blended with the bautiful shadows and light. The 3 parts co-work - blend together and create magic. Now, you can see that placing around the corner, enables the sky light to work on those two walls... If placed more head on - the render would loose the nice effect. Of course, this is a matter of taste - and need. More on how placing the sun affect your render in the next chapter! And the LDP is fully adjustable. So - let´s start playing with the settings, shall we?
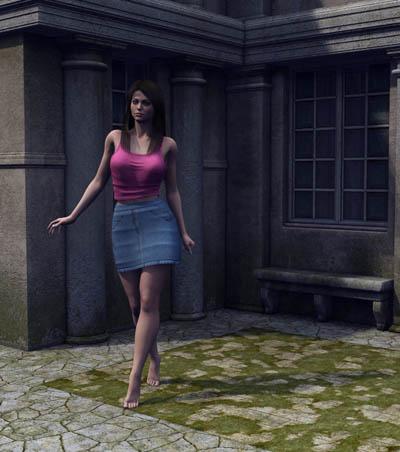
Adjusting the Ambient Light Here, the Ambient Light has been turned down to zero. As you can see, the shadows got deeper and some of the detail is gone. If you load this render into a paint program, you can´t brighten up the black areas - as there is no light there at all. This is why the ambient light is so incredibly important. Please see your manual to see how to adjust the ambient light. Of course, if you don´t want to have those areas lightened - and want to amp things up... Take a look at the next image!
Adjusting the Sun The sun is a lot brighter here, while the sky light remains the same. Ambient light is turned down to zero. This bright look might be something you want to have on a sertain render - and it´s very easy to achieve that effect. Please read in your manual on how to adjust the sun light. Now, while we´re at it - let´s amp this up a little more!
Here, the sun is very bright, the sky light is up a bit too, while the ambient light is still a zero. Straight out from Daz|Studio - no postwork. To adjust the sky light brightess, see that section in your manual. Ok, after having some fun, let´s bring down the sun and sky to normal, and take a look at what happends when we adjust the ambient light to a higher brightess...
With more Ambient Light, and the sun/sky turned to normal, the shadows become less dominant, and you can turn this image into a more pleasant blend... Adjusting the ambient light is a matter of taste - and sometimes a matter of how real you want the results to be. For instance, when faced with a more difficult situation, which will be covered later in this tutorial - you may find yourself in places, where less sun / sky light hit the area seen by your camera. This would give darker results. Even if you amp up the sun / light - you would still get dark results in the areas not hit by any light at all. This is where ambient light can give some extra light. But use it with causion - and this light can´t just be there... It´s meant to come from the other lights spill over or bouncing... If you add to much ambient light, like in the next render, we´ll loose the realism...
And we end up in a flat looking image with a lot of details. Again, this is a matter of taste and need for your particular render. I think it´s time to play with the colors!
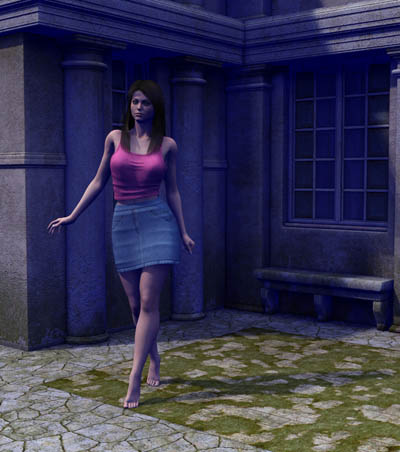
Tinting the Image Adjusting the LDP is not only possible in the intensity of the individual parts. It´s also possible to change the color of each part. There are 4 presets, that come with ready to use color sets. Mid Day, Sun Set, Cloudy and Night. But it doesn´t need to stop there. Read in your manual on how to change colors. Here, i´ve made the ambient light a bit more blue. As the individual parts add up - the overall image gets tinted in light blue. We can also make the ambient light completely blue, RGB 0,0,255 - and that looks spooky!
I exaggerated the effect, to show off this feature. In this render, the ambient light is not only completely blue, but also a lot brighter. Yeah, i hear you... What if... We started to fool around with the Sky Light aswell!
Ok, i have to admit. I accidently dropped the paint bucket all over the place... :) Seriously - this is just to show - that no matter what taste you have (or the lack of it like in this example) - you can have it with this light set.
There you go! This concludes the first part. If you want even more control, and learn more about the sun - and how to control it´s shadows - take a look at part 2! |

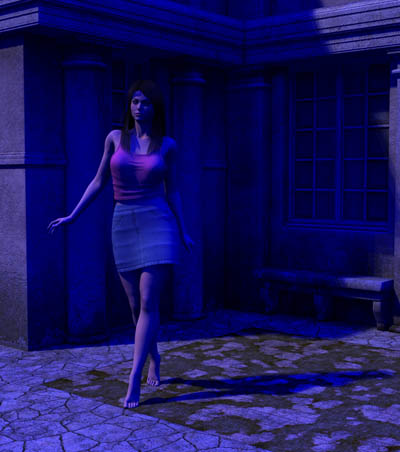 Oups,
sorry about that. Yeah, it IS blue! You have full control over the colors...
The only thing missing here, is a nice colored sun...
Oups,
sorry about that. Yeah, it IS blue! You have full control over the colors...
The only thing missing here, is a nice colored sun...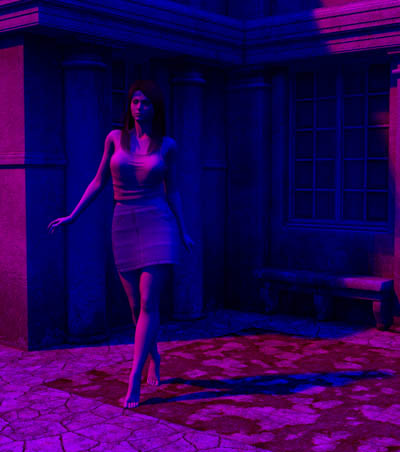
|
Copyright 2005-2007 Waldemar Belwon. All Rights Reserved. |